This article will walk you through some helpful troubleshooting tips to help you navigate within the student account.
High School Plan
Depending on whether your school or district sends myBlueprint data from their student information system (SIS), the High School feature will have different options available.
- If your school sends myBlueprint student information, the following cannot be updated by students or staff members:
- Completed courses from previous years, and the current school year
- Marks and credit values for completed courses
- If any of the above information is missing, incomplete and/or incorrect, reach out to your School District Lead or contact myBlueprint Support
- If any of the above information is missing, incomplete and/or incorrect, reach out to your School District Lead or contact myBlueprint Support
- If your school does not send myBlueprint student information:
- All information on the High School Plan can be updated by the student or any staff member with a myBlueprint Counsellor account
- Note: if you are accessing a student's account using the View Account option from a Teacher account, your access to the High School section is read-only.
For all student accounts, please note the following:
- Pre-requisite and Duplicate Courses
- If students are missing any pre-requisites or have duplicate courses in their plan, the courses will be highlighted in red with a warning message:
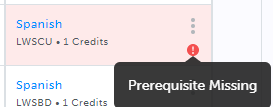
- To remove these messages, either add in a prerequisite course (can be verified by clicking on the course name and checking the description), or remove the duplicate course, as needed
- If students are missing any pre-requisites or have duplicate courses in their plan, the courses will be highlighted in red with a warning message:
- Course no longer offered
- If a course was previously added to the high school plan for a future year but is no longer enabled at your school, it will be flagged in red as No Longer Offered.
- Students should either click the three dots to change the course or if they believe the course is actually offered at the school, check with a guidance counsellor.
- Don't see a course you need, or need to add additional courses beyond the maximum number of spaces set by your school?
- Students in this scenario should reach out to a guidance counsellor for assistance.
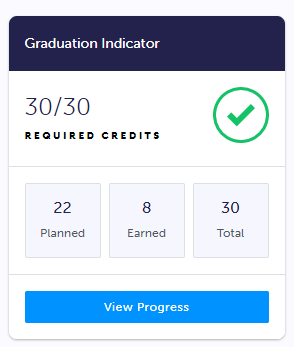
The Graduation Indicator:
- Clicking on View Progress brings up a panel that shows students what credits they have planned, earned and what credits they have yet to earn.
- After clicking View Progress, students can click the Options menu (three dots) to do the following:
- Substitute Course
- If they need to substitute Compulsory or Elective courses with another course to meet a graduation requirement
- Change Graduation Requirements
- If they need to update their Provincial high school diploma or certificate type
- Note: changing the diploma or certificate type will also update the number of credits required for graduation, depending on your provincial requirements.
- Substitute Course
Pathway Eligibility:
- Students first need to add courses into their high school plans to unlock the various pathways

- Note: not all pathways unlock at the same time
- Apprenticeship and Workplace pathways typically unlock with fewer courses populated in the plan
- College and University pathways unlock based on:
- Post-secondary program requirements
- Provincial high school graduation requirements
- In order to see University pathway options in this panel, you will need to ensure that you have all required credits in the Graduation Indicator - don't forget that you need to complete a high school diploma for admission to University!
Class Activities
Class Activities must be completed with the steps outlined below for the activities to be marked as complete:
- Click Class Activities from their main dashboard page
- Click the relevant Class Box
- Note: If the class box has no new activities, the teacher has not created activities yet, or the student has already completed all available activities. If there is no class box that means the teacher has not yet set up their class or added the student to the class list in their account.
- Click Start Activity
- Complete the activity
- Click Post
- Select the Portfolio to post to
- Click Add to Portfolio
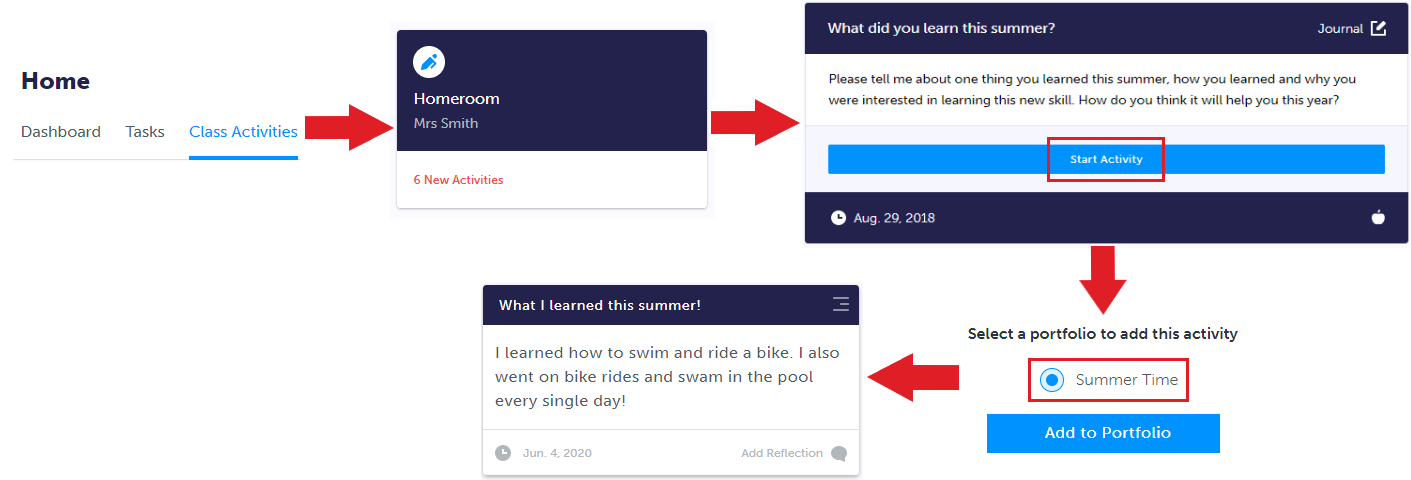 Students' completed class activities are always linked to portfolios. Whatever portfolio the student decides to post the activity to (Step 6) is where the completed activity will be saved.
Some important considerations for class activities:
- If students delete the portfolio box for their completed activity, the activity marks as incomplete and moves back to the Active tab under Class Activities
- If students delete the portfolio containing the completed activity portfolio box, the activity is marked as incomplete and moves back to the Active tab under Class Activities
- In both cases, teachers will receive a notification of deletion in their account, and the activity would need to be redone to be marked as complete
More of a visual learner? Check out the following video that walks you through the activity completion process.
Tasks and Goals
Tasks
- IPP Tasks will only mark as complete once the task itself is completed, i.e. Favourite 1 Occupation
- Once the student completes the task, it will move to the Completed tab
- The more tasks completed, the more points students collect, which can be used towards entering prize draws
Note: Tasks reset before the start of each school year - every September, students have a fresh slate of new Tasks to complete!
- Any tasks completed within the previous school year (September - August) are not counted toward completion of the current year's tasks. In other words, if a student created a portfolio box and added a reflection last year, it will not count towards the completion of the same task this year
- This applies to Goals as well - if students have goals that were created the year prior, they will not count towards the IPP Tasks which require Goal creation, i.e. Add 2 Goals
- The Task to 'Add 1 Box and Write a Reflection' in Portfolios requires that students add a Portfolio Box (any type), and additionally add a reflection/comment by clicking Add Reflection in the bottom right corner of the box:

Goals
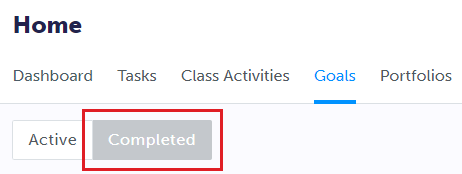
- Goals are set up by students and are only completed when students click Complete Goal? in the bottom right of the goal
- Once this occurs the goal moves into the Completed tab - it can still be accessed by clicking the Completed link within the Goals section: