

myBlueprint supports Single Sign On (SSO) integration to provide users a seamless login experience with existing Account Management System credentials. Account Management System refers to the user authentication and authorization system that allows users to access school computers. An example of an Account Management System is Microsoft Active Directory (AD).
Account Provisioning and Authentication
myBlueprint SSO allows for both account provisioning and authentication. For existing partners, or partners doing data integration, SSO can be used for authenticating the user, and providing a seamless login experience.
For new partners, SSO can be used to create new myBlueprint accounts for your users. We use the information provided by your IdP to pre-populate the signup form to simplify the account creation process.
Direct Integration
As an internet based application, myBlueprint is to be considered a SP (Service Provider) in the context of SSO. It facilitates SSO by delegating user login to the Account Management System’s IdP (Identity Provider). The following are required for successful integration:
- The IdP must be publicly accessible on the Internet
- The IdP must authenticate the user with the Account Management System
- The IdP must support SAML 2.0, or WS-Federation
- A trust must be setup between IdP and SP through either exchange of metadata or secret keys/configurations
- The IdP must be configured to provide the claims outlined in Parameter Specifications
Data Integration and Single Sign On
For our partners doing data integration, SSO allows users to seamlessly login to their account with their course records imported. Many of the data fields outlined below are unnecessary for the imported users as the data is already imported from your Student Information System.
The only required parameter is the User ID, which will be a unique ID that corresponds with an entry from your SIS.
The other fields are optional; however, we strongly recommend providing the Email claim as well to support staff SSO. Please note, without the email, existing staff accounts cannot be linked to an SSO credential.
Parameter Specifications
Parameter | Required | Info | ClaimType (Suggested) |
User ID | Required | Unique ID. Can be any unique string | http://schemas.xmlsoap.org/ws/2005/05/identity/claims/nameidentifier |
Student ID | Required for Students (Not used for Staff) | Ministry Provincial Education Number or SIS Student Number | http://mybp/claims/ministryid http://mybp/claims/integrationid http://mybp/claims/studentnumber |
User Type | Optional (Required for staff account provisioning) | “Student” (Default) “Elementary Teacher” “Secondary Teacher” “Secondary Teacher Guidance” “Parent” “Teacher”[ | http://mybp/claims/usertype |
School ID | Optional (Required for staff account provisioning) | Unique School ID | http://mybp/claims/schoolid |
Optional (Required to link existing staff accounts) | http://schemas.xmlsoap.org/ws/2005/05/identity/claims/emailaddress | ||
First Name | Optional | http://schemas.xmlsoap.org/ws/2005/05/identity/claims/givenname | |
Last Name | Optional | http://schemas.xmlsoap.org/ws/2005/05/identity/claims/surname | |
Grade | Optional (Recommended) | 0, 1, 2, etc. | http://mybp/claims/grade |
Birthday | Optional | yyyy-MM-dd yyyy-M-d MM/dd/yyyy M/d/yyyy | http://mybp/claims/birthday |
Gender | Optional | 1: Male 2: Female | http://schemas.xmlsoap.org/ws/2005/05/identity/claims/gender |
Salutation | Optional for Staff | Mr, Mrs, Miss, Ms, Dr | http://mybp/claims/salutation |
If your data or claimtype does not conform to the exact format specified, speak to your myBlueprint IT contact.
Known Working IdPs
ADFS (Active Directory Federated Services) as IdP, authenticate with AD (Active Directory)
Azure Active Directory as IdP, through SAML 2.0
See below for details on setting up integration through Azure AD.
Google Workspace as IdP, through SAML 2.0
See below for details on setting up integration through GSuite
ADFS/SAML 2.0 Integration Steps
myBlueprint supports any IdP implementing SAML 2.0. To proceed with setting up SSO:
- Access myBlueprint’s security token service metadata (link below) to be used when setting up trust between your IdP and myBlueprint
https://sts.myblueprint.ca/FederationMetadata/2007-06/FederationMetadata.xml
- Configure your IdP to send the required claims
- Send your myBlueprint IT contact your IdP Metadata
- Provide an SSO testing account (username/email and password)
We will review and complete testing to ensure the SSO process works correctly. Depending on the parameters provided, users may be required to enter additional information upon first login.
Implementation Options
myBlueprint Landing Page
- A myBlueprint Landing Page (i.e. myBlueprint.ca/District) provides a “Login with school account” button.
- Users can also click School Account Login at myBlueprint.ca and select their district name from the drop-down menu, if SSO is enabled.
- This opens a dialogue with the District Login Screen provided by the District where users can enter their credentials (district username/email and password). Entering the correct credentials directs the users into their myBlueprint account.
- Users can also be brought directly into their myBlueprint account if they are already authenticated.
Direct SSO Login
If you have a student (or staff) portal where users are already logged in with their SSO credentials, we can provide you a Direct SSO Login URL that will directly log users into their myBlueprint account.
This option is an excellent way to provide seamless access to their myBlueprint account - we recommend embedding it in any web portal, shared bookmarks, or tech resource pages used by your district. To obtain your direct login URL if you already have SSO set up, please contact myBlueprint Support.
Microsoft Entra Setup Guide
To set up Microsoft Entra ID integration (formerly known as Azure AD), you need:
- a licensed version of Entra ID with the option to create custom SAML applications
- an account with at least the 'Cloud Application Administrator' or 'Application Administrator' role
- Sign in to the Microsoft Entra admin center
- Navigate to Applications > Enterprise Applications
- Click New Application
- Click Create your own application
- Name it myBlueprint, select the option 'Integrate any other application you don't find in the gallery (Non-gallery)' and click Create
- Click Single Sign-on in the left-hand nav menu
- Click SAML
- Set up the Basic SAML Configuration as follows - ensure formatting is an exact match
- Identifier: http://sts.myblueprint.ca/adfs/services/trust
- Reply URL: https://sts.myblueprint.ca/adfs/ls/
- Click on the pencil icon to edit 'step 2', User Attributes and Claims, then configure your claims (refer to Parameter Specifications)
- Map Student Number to a field that contains student’s Provincial Student#, or other unique ID number from your SIS. Please advise your implementation contact which ID will be used, or if this information is not available in Entra ID.
- For provincial student number, use the claimtype http://mybp/claims/ministryid
- For school district / SIS local student ID, use the claimtype http://mybp/claims/integrationid
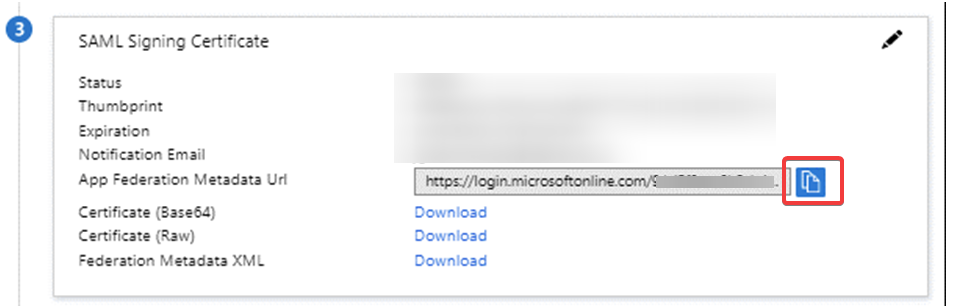
- Copy the App Federation Metadata URL (see below) and send it to your myBlueprint contact, along with a screenshot of the Attributes & Claims panel referenced above.
- Please copy and paste the metadata URL into an email, rather than sending the XML file, as this will allow us to automatically update the signing certificate when required.
- Please copy and paste the metadata URL into an email, rather than sending the XML file, as this will allow us to automatically update the signing certificate when required.
- Ensure that all users of the myBlueprint application are granted access in Azure: all students in grades licensed by the district, and all teachers/counsellors or other staff working with the platform.
- Alternately, you can use the built-in ‘everyone’ group, and staff access will still be subject to admin approval within the myBlueprint application.
- For instructions, refer to:
Google Workspace Setup Guide
Google Support Article for reference
Navigate to your Google Workspace Admin page
Go to Apps > Web and Mobile Apps
Click Add App and then Add custom SAML app.
Enter myBlueprint as the name of your app and click Continue
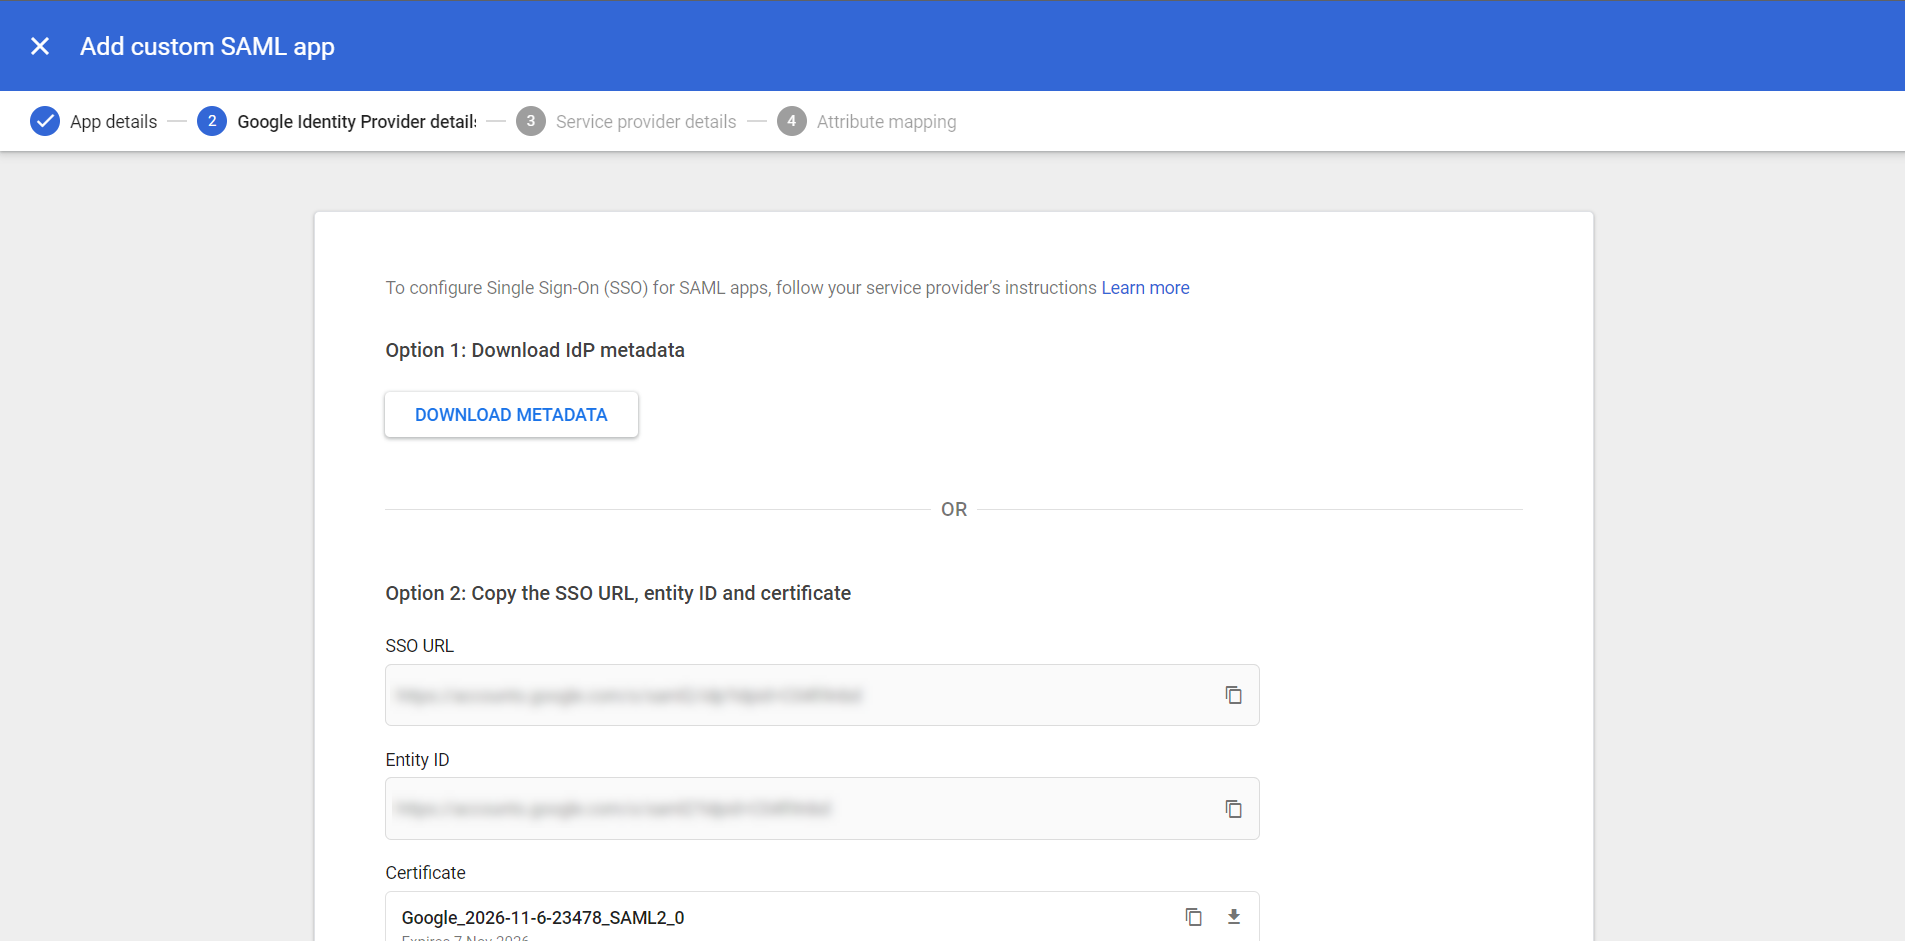
Download the IdP Metadata file, and send this to your implementation contact or support@myblueprint.ca
- Click Continue, then set up the Service Provider details as follows.
- ACS URL: https://sts.myblueprint.ca/adfs/ls/
- Entity ID: http://sts.myblueprint.ca/adfs/services/trust
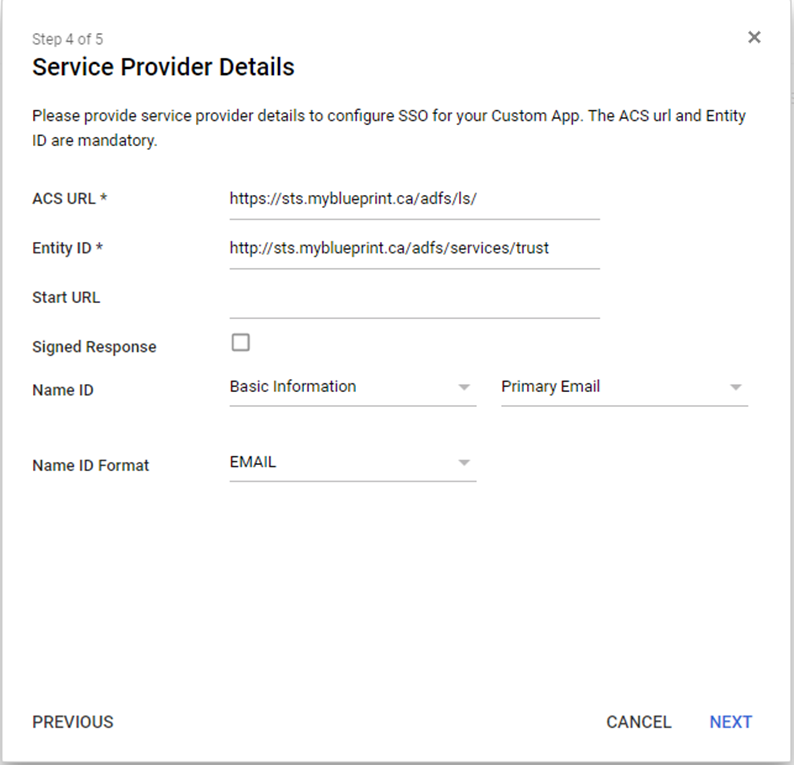
- The Name ID can be any value, as long as it is unique for all users. Unless you wish to use a different value for your name ID, you can leave it set as the default (primary email, format 'undefined').
- Click Continue, then configure your claims on the Attribute Mapping page. The main required claims to select under 'Google Directory Attributes' are: primary email, first name, and last name.
- For the App attributes, enter the full URL-format ClaimType for the corresponding parameter as detailed in the Parameter Specifications section (for example, Primary Email > http://schemas.xmlsoap.org/ws/2005/05/identity/claims/emailaddress)
- The application is OFF for everyone by default - enable it for all users by clicking User access, selecting ON for Everyone and clicking SAVE