

This article will walk you through a high-level overview of the two counsellor account types in myBlueprint - Counsellor, and Counsellor Lead.
You can also check out this video, which provides an overview of both account types.
Shared Features
Both the Counsellor and Counsellor Lead accounts have access to Students, Courses, Messages, Student Resources, and Reports, all accessible from the navigation menu on the left-hand side of the screen. The breakdown below outlines the specific actions which can be completed in each section by Counsellors.
Students
- View all student accounts, including student portfolios, Task progress, High School Plans, and any other work students have completed in myBlueprint
- For schools using the Course Selection features of myBlueprint:
- Approve plans and move plans into Pending Export
- Change course selections for students in the Pending Approval or Pending Export tab
- Update course selection status for students (i.e. re-allow or force submissions, mark as not completing course selection etc.)
Courses
- Enable and disable courses
- Edit course information - description, grade level, credit value, and more
- Create course packages
- Add new courses - only if your school does not have SIS Data Integration and Course Selection enabled in myBlueprint
Teacher Account
- Access a teacher account through your counsellor or counsellor lead account - click the box on your Dashboard labelled either 'Classes' (if you've already created some classes) or 'Try your new teacher account' (if you haven't created classes yet)

- Check out our Secondary Teacher Account article for an overview of the features within that account type
Messages
- Send messages to all students
- Send messages to individual students or a selected group of students
- You can also send class messages through the teacher view mentioned above, once you have classes created
Student Resources
- Add resources (files or URL links) for individual grades or for all grades - these resources appear at the bottom of the main Dashboard page within student accounts
Reports
- Access reports for Course & Graduation Planning and Student Progress & Interests
Counsellor Lead Account Features
There are two main differences between the Counsellor and Counsellor Lead accounts. The following features are only accessible in a Counsellor Lead account.
Staff
- Within a Counsellor Lead account, or Elementary Counsellor with Staff Admin access, there is an additional option in the navigation menu and on the Dashboard for Staff
- Within this section, you can view all staff accounts at the school, update existing accounts, and invite new staff to join:

- To update an existing staff member's account, click the menu button (three dots) along the right-hand side. From there, you can click Edit Staff to update the name, email, password, or account type, or Delete Staff if the staff member is no longer at your school.
- You can click Add Staff to send an email invitation for a new staff member to create a myBlueprint account. Accounts invited this way are automatically pre-approved for access to the school.
- As a Counsellor Lead you may also receive requests for approval from staff creating their accounts for the first time: these are staff who have signed up manually for an account at the school, rather than being invited by a Counsellor Lead.
- You can approve their requests either directly from the email message you receive, or within this section of your account.
- The email notification for the approval request goes to the Counsellor Lead or elementary administrator selected from a list when signing up, but anyone with access can approve the request from the Staff section.
- Approval is required only for new staff accounts, not for students.
Course Selection Manager
- This is your point of access for all course selection related features.
- It only appears if your school is set up for 2-way data integration with myBlueprint (meaning that students submit their course choices in myBlueprint and they are exported back to your Student Information System)
- Take a look at our article Understanding your Course Selection checklist for more details on how to utilize the course selection manager
Tips & Shortcuts
Below are some tips and key features that will make navigating within your account easy and efficient.
Group Actions Button
This button is accessible from within the Students section of your account, and can be used to perform a number of different tasks for multiple students at the same time.
Note: to access this button, you must check off at least one student's name in any of the Student tabs.
Did you accidentally mark your students as "Not Completing Course Selection" or unintentionally move them into Pending Export?
To undo this:
- Check off their names
- Click the Group Actions button
- Click either Re-Allow Submission or Move to Pending Approval
Are you looking to print students' course selection sign-off sheets?
- Check off their names
- Click the Group Actions button
- Click Print Options
- Check off Course Selection Sign Off Sheet
- Click Print
Do you want to view a brief summary of students' course selections?
- Check off their names
- Click the Group Actions button
- Click View Course Submission Summary
Other features you can access from the Group Actions button include:
- Reset Passwords & Send Messages
- Can be done for a single student or for any selected group of students
- Disable Submission
- This will prevent the student from submitting their course selections
- If needed, you can re-enable for the student by clicking the 3 grey dots to the right of the student's name and re-allowing submission
- Not Completing Course Selection
- This will mark the student(s) as Not Completing and prevent them from submitting course selections
- This also removes the students from the 'Not Submitted' percentage calculated on your Dashboard
- Force Submissions
- Pushes through a submission with the courses currently populated under Next Year for the student
- Can be done for students who are Not Activated and you need to submit on their behalf
- Can also be used to override a missing pre-requisite, if you have the option enabled in your course selection settings to prevent submission with missing pre-requisite courses
- Not Returning
- Can be used for students who do not need to complete course selection because they are graduating or transferring to another school
- Unlike 'Not Completing Course Selection', this option requires selecting a destination (e.g. College, University, Other School, etc.)
- The minimum grade to display this option is set in the Course Selection Configuration - by default it is available only to Grade 12 students
Filters
- When you click into Students, you will see the Filters feature to the far right (see screenshot below)
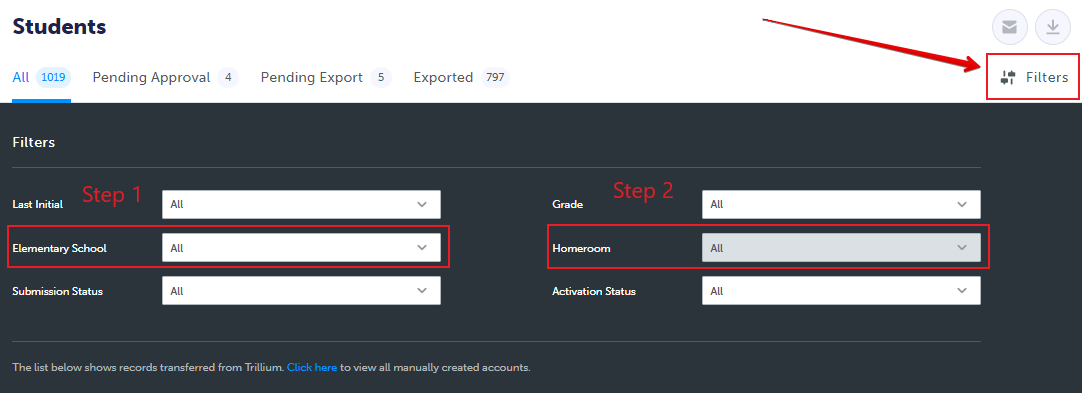
- Using filters will allow you to search for students based on different criteria, which can make it easier if you have hundreds of students. Some commonly-used filters include Elementary School, Submission Status and Grade
- Note: to access the Homeroom filter, you must first filter by Elementary School, and then by Homeroom (see screenshot above)
Pro Tip: Can't see your students on the list even though they have created their accounts?
- See the screenshot below for where you can access them:

- Click the link in blue: Click here to view all manually created accounts
- Find your student on the list
- Click the 3 grey dots to the right of their name. You can either:
- Reset the student's email and/or password so they can log in and activate their account
- Click Activate Student
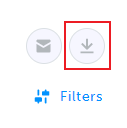
- This will require the student's Provincial identification number and their date of birth. This information can be found via the Excel file in your Students tab by clicking the download arrow (see screenshot below)
- When you click into Courses, you will see the Filters feature to the far right (see screenshot below)
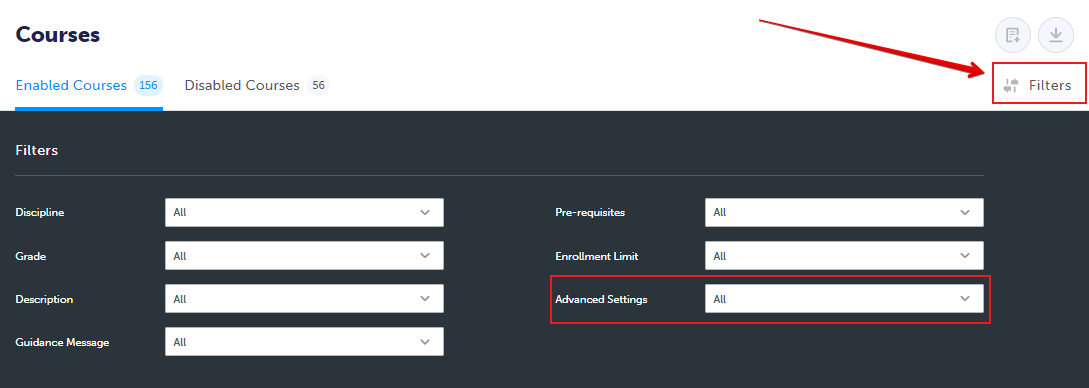
- Using filters will allow you to easily search for courses. Some filter options to note are:
- Advanced Settings
- Custom (Locked) - courses that won't be updated by the next course import from the Student Information System
- Note: All created course packages are custom locked by default
- E-Learning Placeholder - courses set as a placeholder code
- When students add the placeholder course to their plans they will be prompted for the actual course they plan to take
- View Only - courses that students can view and add to their high school plans, but cannot submit as part of their course selections for next year
- Ideal for courses that are offered in alternate years - courses can be marked as View Only when they will not be offered in the following school year
- Allow Duplicate - allows courses that have the same first 5 characters within their course codes to both be added to a High School Plan, and counted in the Graduation Indicator
- Note: both courses would need to be set to Allow Duplicate
- Custom (Locked) - courses that won't be updated by the next course import from the Student Information System
- Advanced Settings
You can also access our Student Account Troubleshooting for Course Selection article, for a more in depth explanation on how to troubleshoot and resolve student account-related issues for course selection.
Are you more of a visual learner? You can also check out our Support Centre, where you will find videos to walk you through the features of the counsellor account. You can also access live webinars from our Support page.